Getting Started
Learn how to sign up, navigate the dashboard, and create your first workspace and workflow.
Landing Page
When you first visit Eddy, you'll be greeted by the welcome screen.
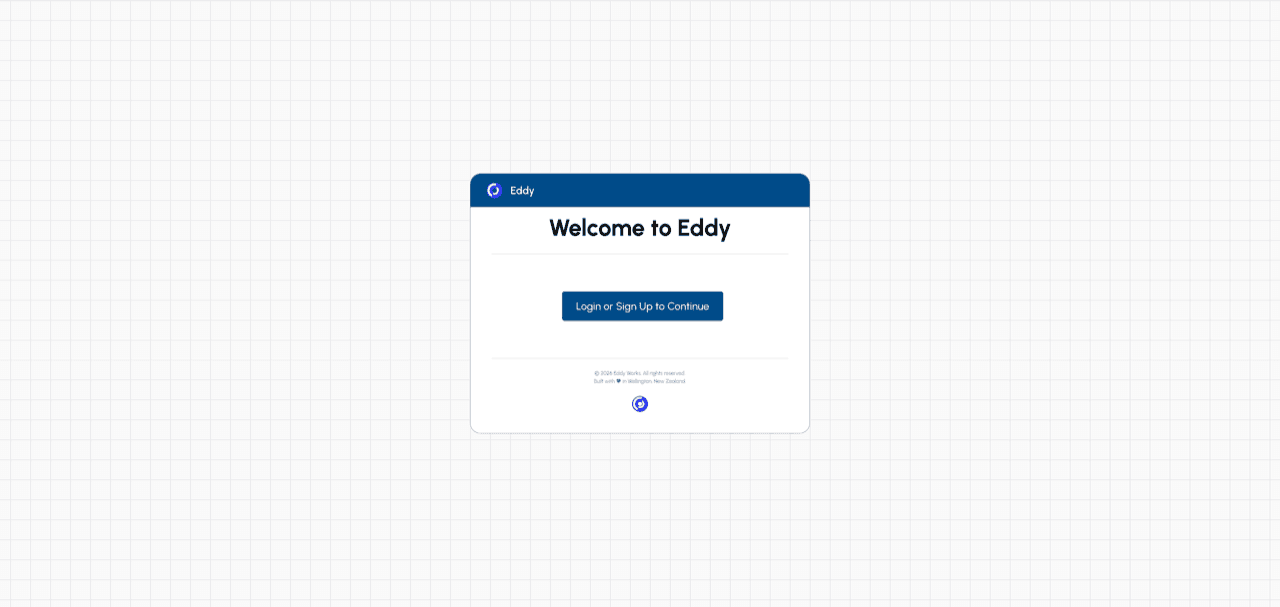
The landing page features:
- The Eddy logo and branding in the header
- A prominent "Login or Sign Up to Continue" button to access the platform
- Footer with copyright information
Click the button to proceed with authentication.
Authentication
After clicking "Login or Sign Up to Continue", you'll be redirected to the authentication page.
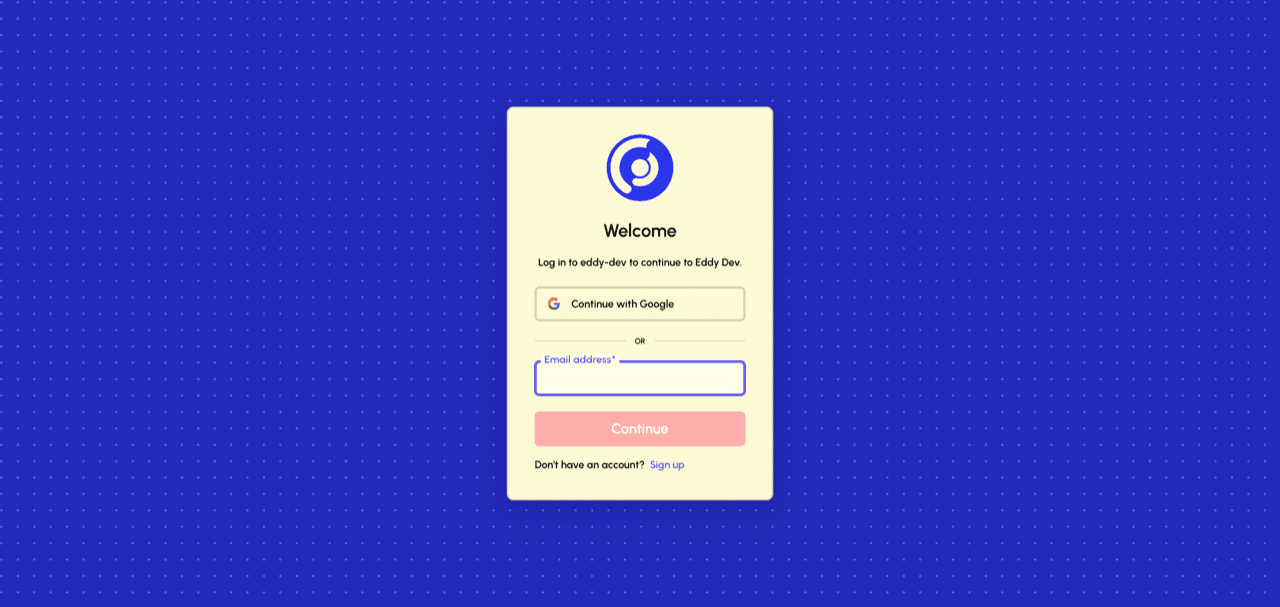
Eddy uses Auth0 for secure authentication. You have two options:
- Continue with Google - Quick sign-in using your Google account
- Email address - Enter your email and click "Continue" to sign in with email/password
If you don't have an account yet, click the "Sign up" link to create one.
Home Dashboard
After logging in, you'll land on your home dashboard.
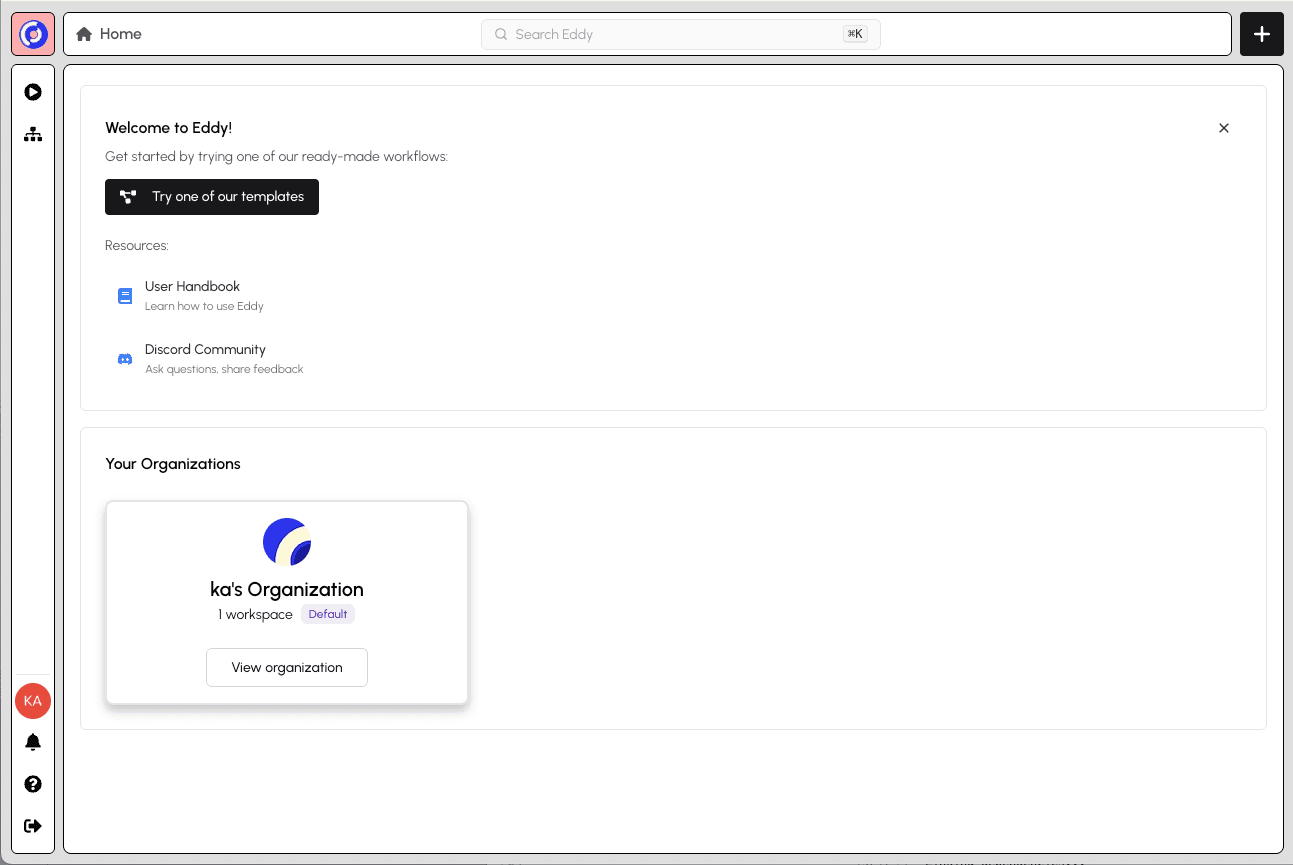
The dashboard shows:
- Welcome to Eddy! - Convenient links to tools to get started (dismissible)
- Recent Visits - Quick access to workspaces and workflows you've recently viewed (appears once you have activity)
- Your Organisations - Organisations you belong to
- Navigation bar - Access Sessions, profile, notifications, help, and logout
You might belong to multiple organisations, if you were invited to join Eddy, but for now, click on the organisation that matches your user name.
Organisations
Within an organisation, you'll see a list of workspaces. You can think of a workspace as a set of workflows managed by a common team of people. One has been automatically created for you.
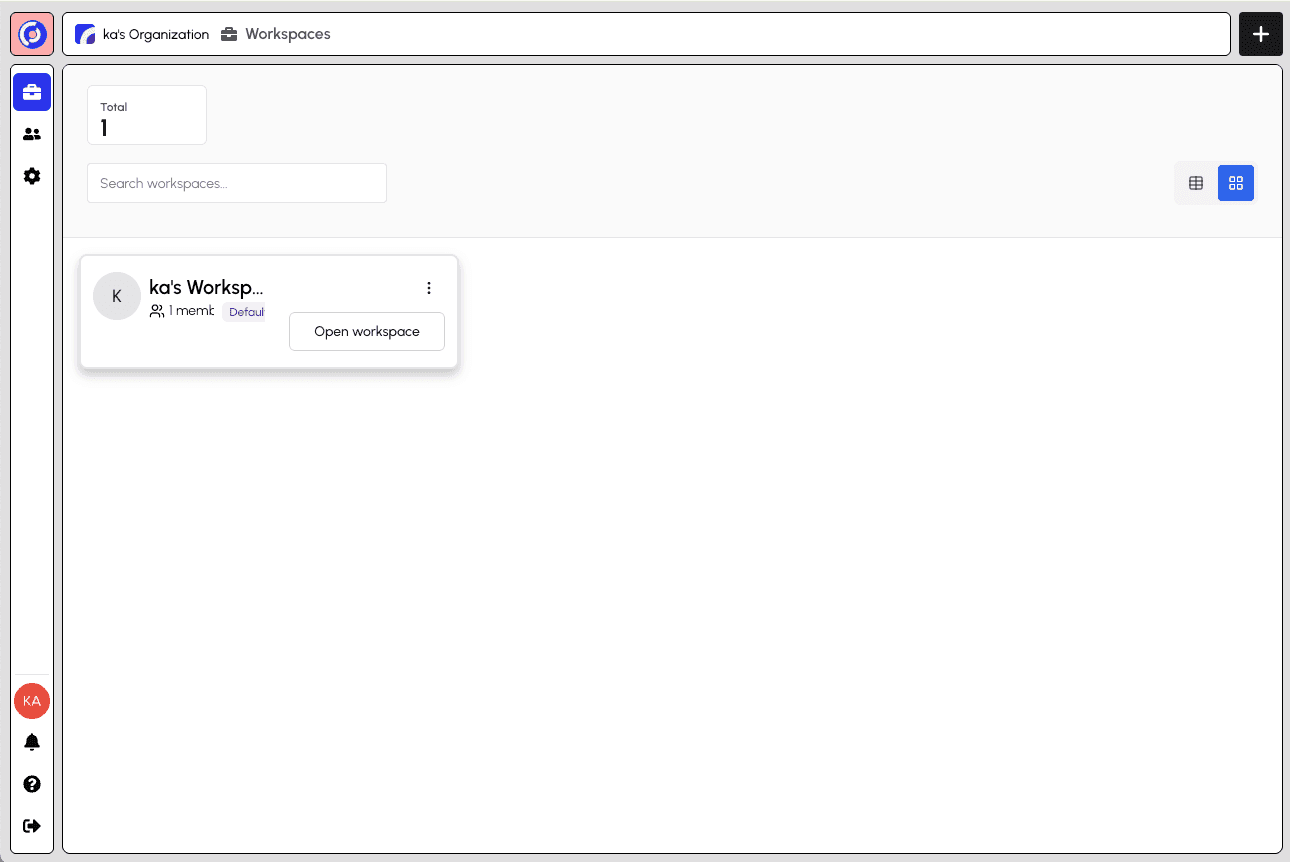
In the left navigation for organisations, you'll have access to:
- Workspaces - View and manage workspaces in this organisation
- Members - View and manage organisation members
- Settings - Manage the name, description, and other details of the organisation
Click the workspace that has been created for you.
Workspace Overview
After selecting your workspace, you'll see its overview page.
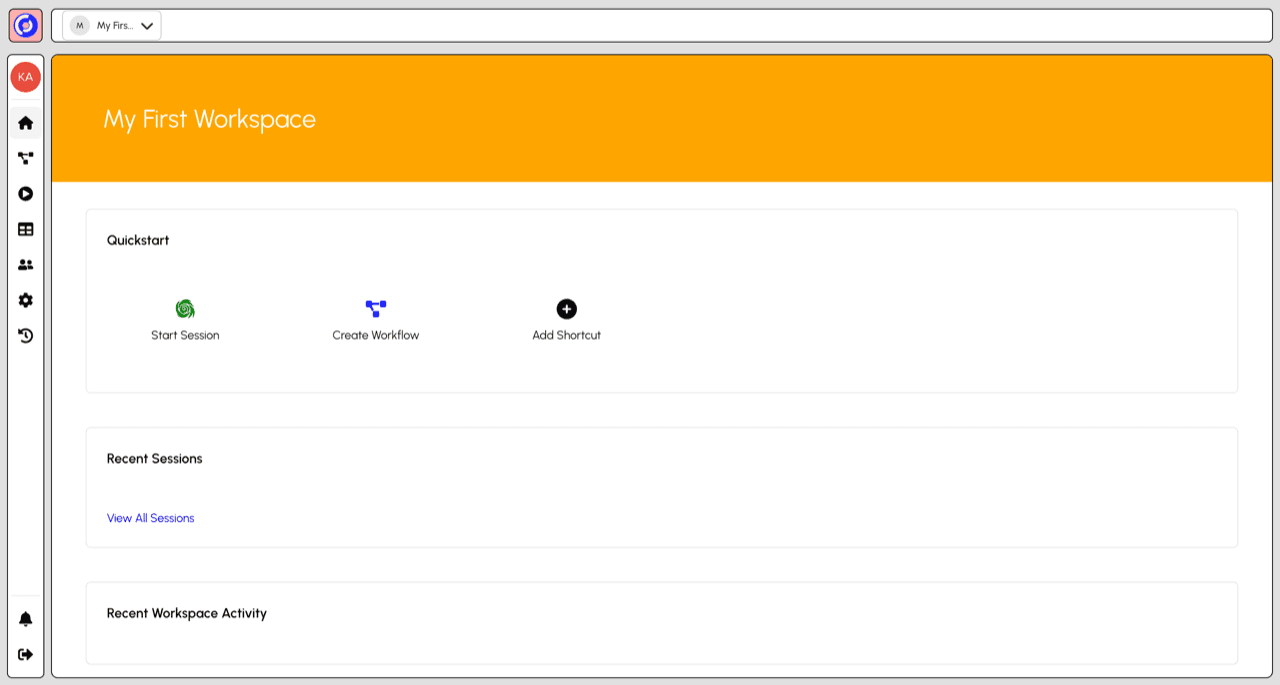
The workspace overview includes:
- Quickstart - Fast access to Start Session and Create Workflow
- Recent Sessions - View your latest session activity
- Recent Workspace Activity - Track what's happening in the workspace
- Side navigation - Access Overview, Workflows, Sessions, Sheets, Members, Settings, and Activity
Inviting a Member
To invite team members to your workspace, click Members in the side navigation.
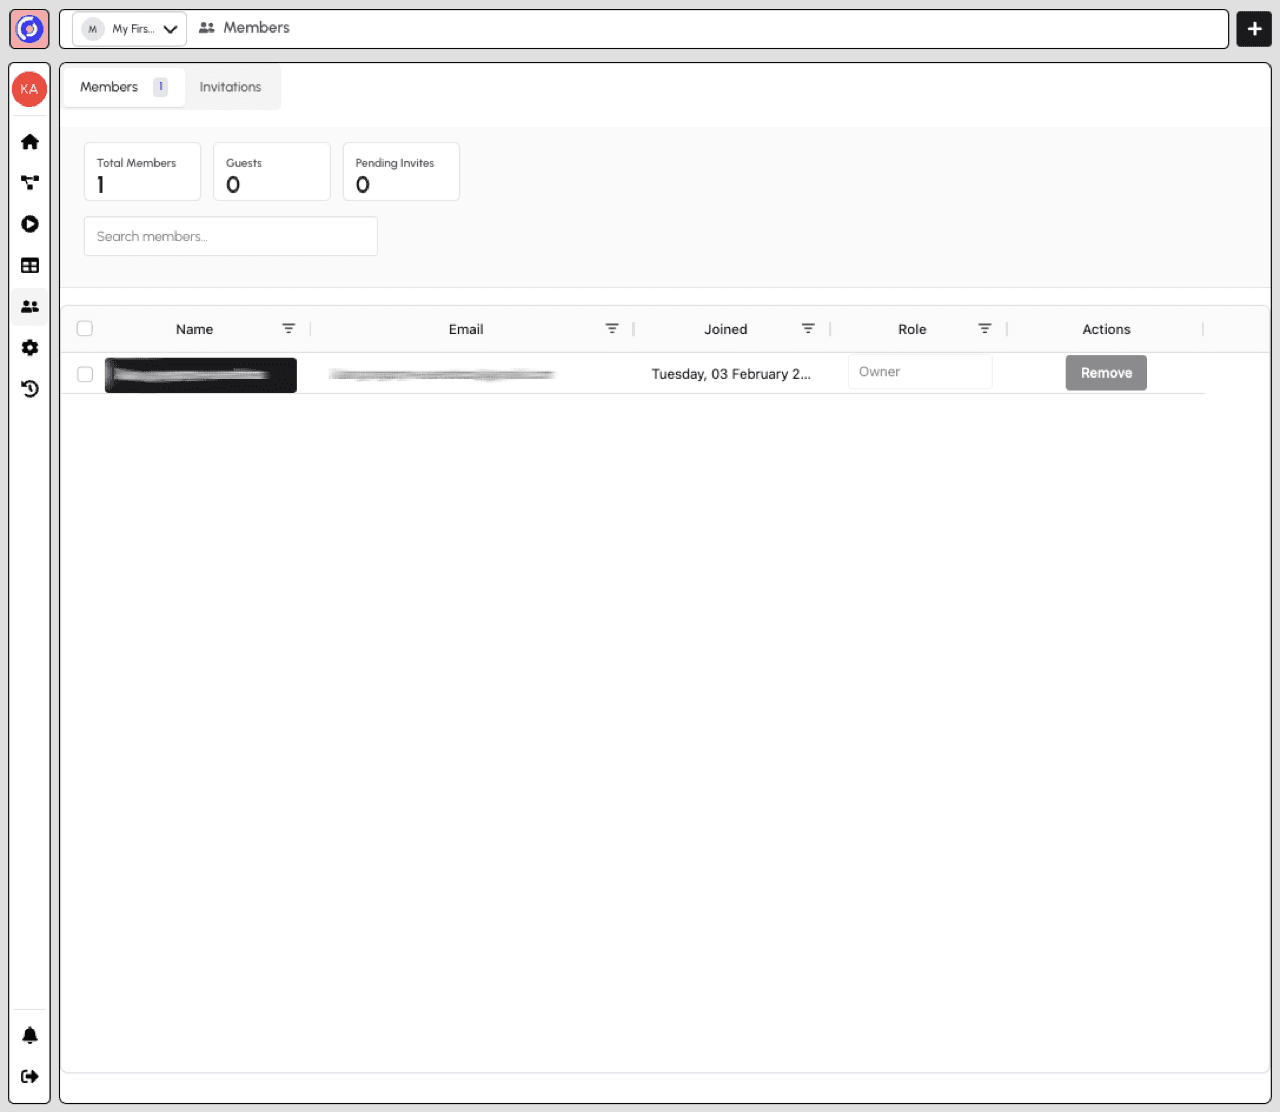
The Members page shows:
- Tabs to switch between Members and Invitations
- Stats showing Total Members, Guests, and Pending Invites
- Member table with name, email, join date, role, and actions
- Search to find specific members
Click the "Invite Member" button in the top bar to open the invitation form.
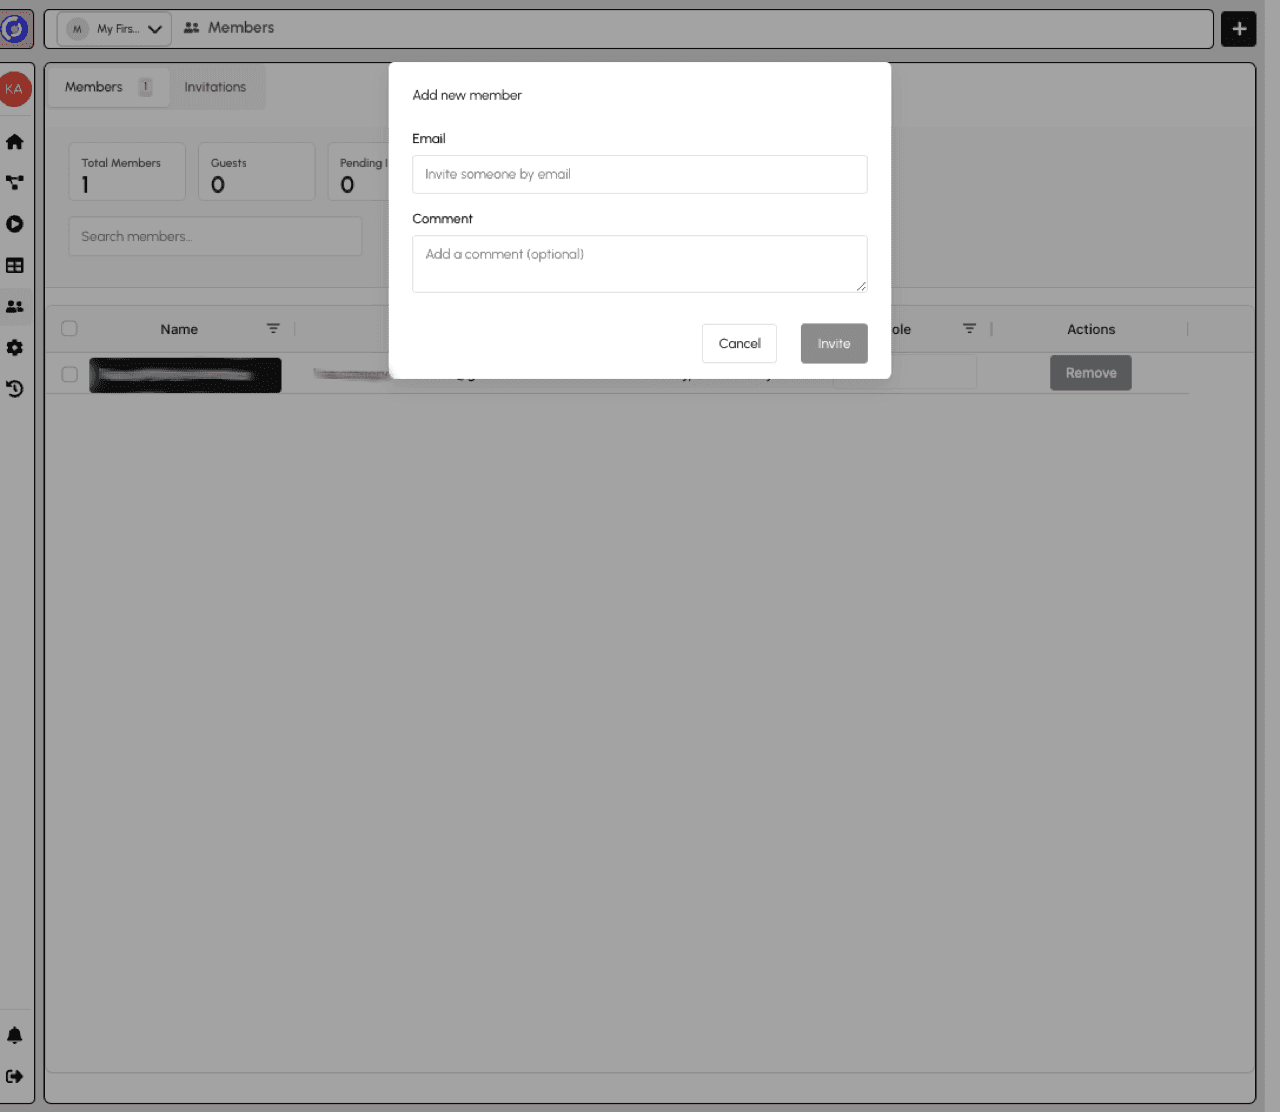
To invite a new member:
- Enter their email address in the Email field
- Optionally add a comment to include with the invitation
- Click Invite to send the invitation
The invited user will receive an email with a link to join your workspace. You can track pending invitations in the Invitations tab.
Creating a Workflow
Click "Create Workflow" from the Quickstart section to build a new workflow.
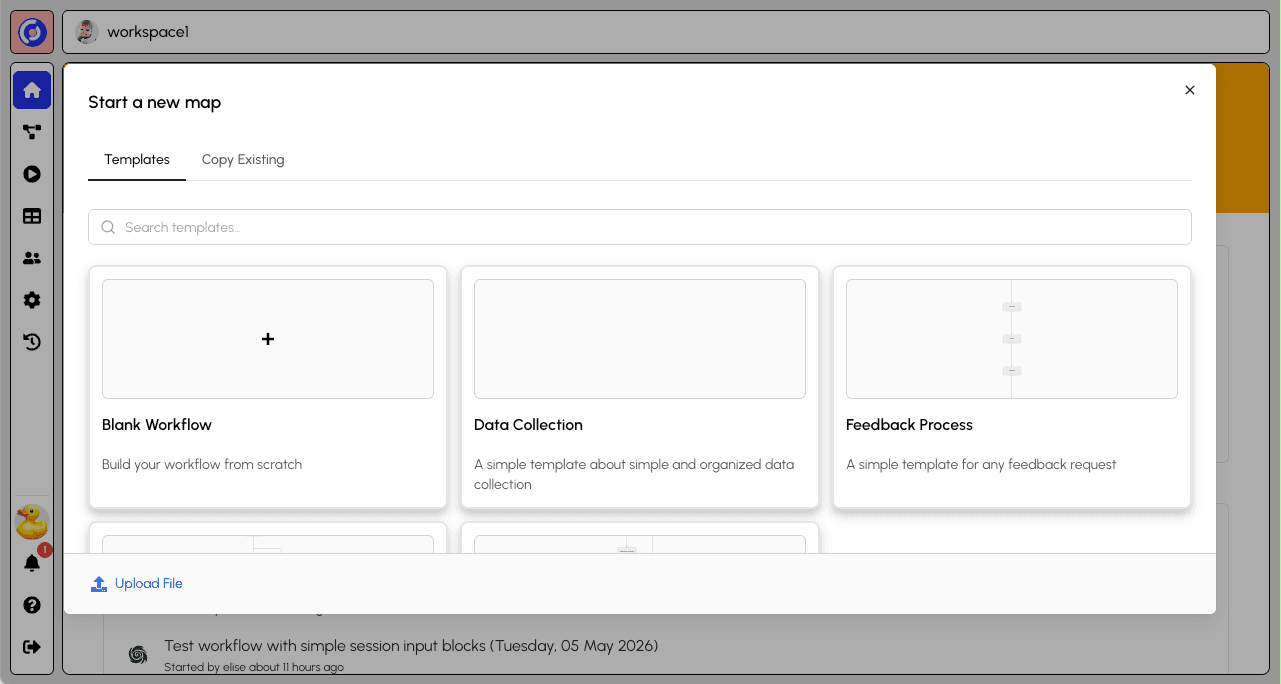
Choose how to create your workflow:
- Blank Workflow - Build from scratch
- Templates - Use a pre-built template
- Copy Existing - Duplicate a workflow you have editing access to
- Upload File - Import an existing workflow file
Select "Blank workflow" to reveal the workflow details form.
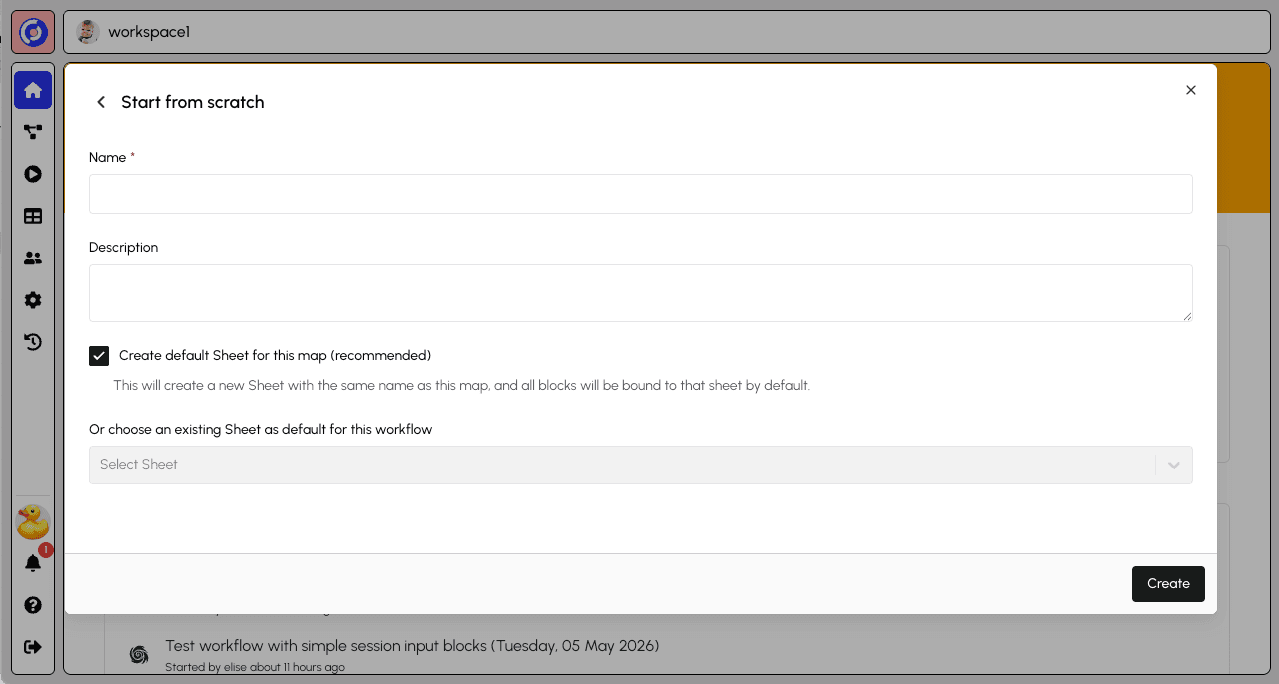
Fill in:
- Name - Give your workflow a descriptive name
- Description - Explain what this workflow does
- Create default Sheet - Recommended option that creates a linked data sheet
Click Save to create your workflow. You'll be redirected to the Workflow Builder.
Next steps: Ready to build your workflow? See Your First Workflow for a step-by-step tutorial.